Cover to Cover
Exposing the Bookbinder's Ancient Craft
Bookbinding is a humble pursuit. Rarely does it receive the attention and glamour afforded to other ancient crafts. Unlike the silversmith or the glassblower, whose talents are immediately obvious, the binder’s craft of construction is largely concealed. Durability and function are foremost in the bookbinder’s mind; theirs is a role of guardianship – they serve to protect the book’s contents, guaranteeing its access for generations of readers.
But what if a book’s binding was a story in itself? Could we appreciate and value the intricacy and complexity of its sewing system, its control centre in many ways, if we knew why it was sewn in a particular style? Hidden from view, we hardly spare a thought for its purpose, and yet, the bookbinder does. In fact, there are always reasons why these skilled craftsmen and women choose to bind a book in a certain way.
A binding tells us as much, if not more, about a book’s provenance than an owner’s signature or bookplate. It assists librarians and historians to date and place a work. It provides insight into an owner’s economic and social standing. It imparts information about the spread of ideas, customs, technologies and artistic tastes of the time. It reflects the perceived significance of the book’s content and, importantly, it tells us exactly how a book was intended to be used and how it was actually used.
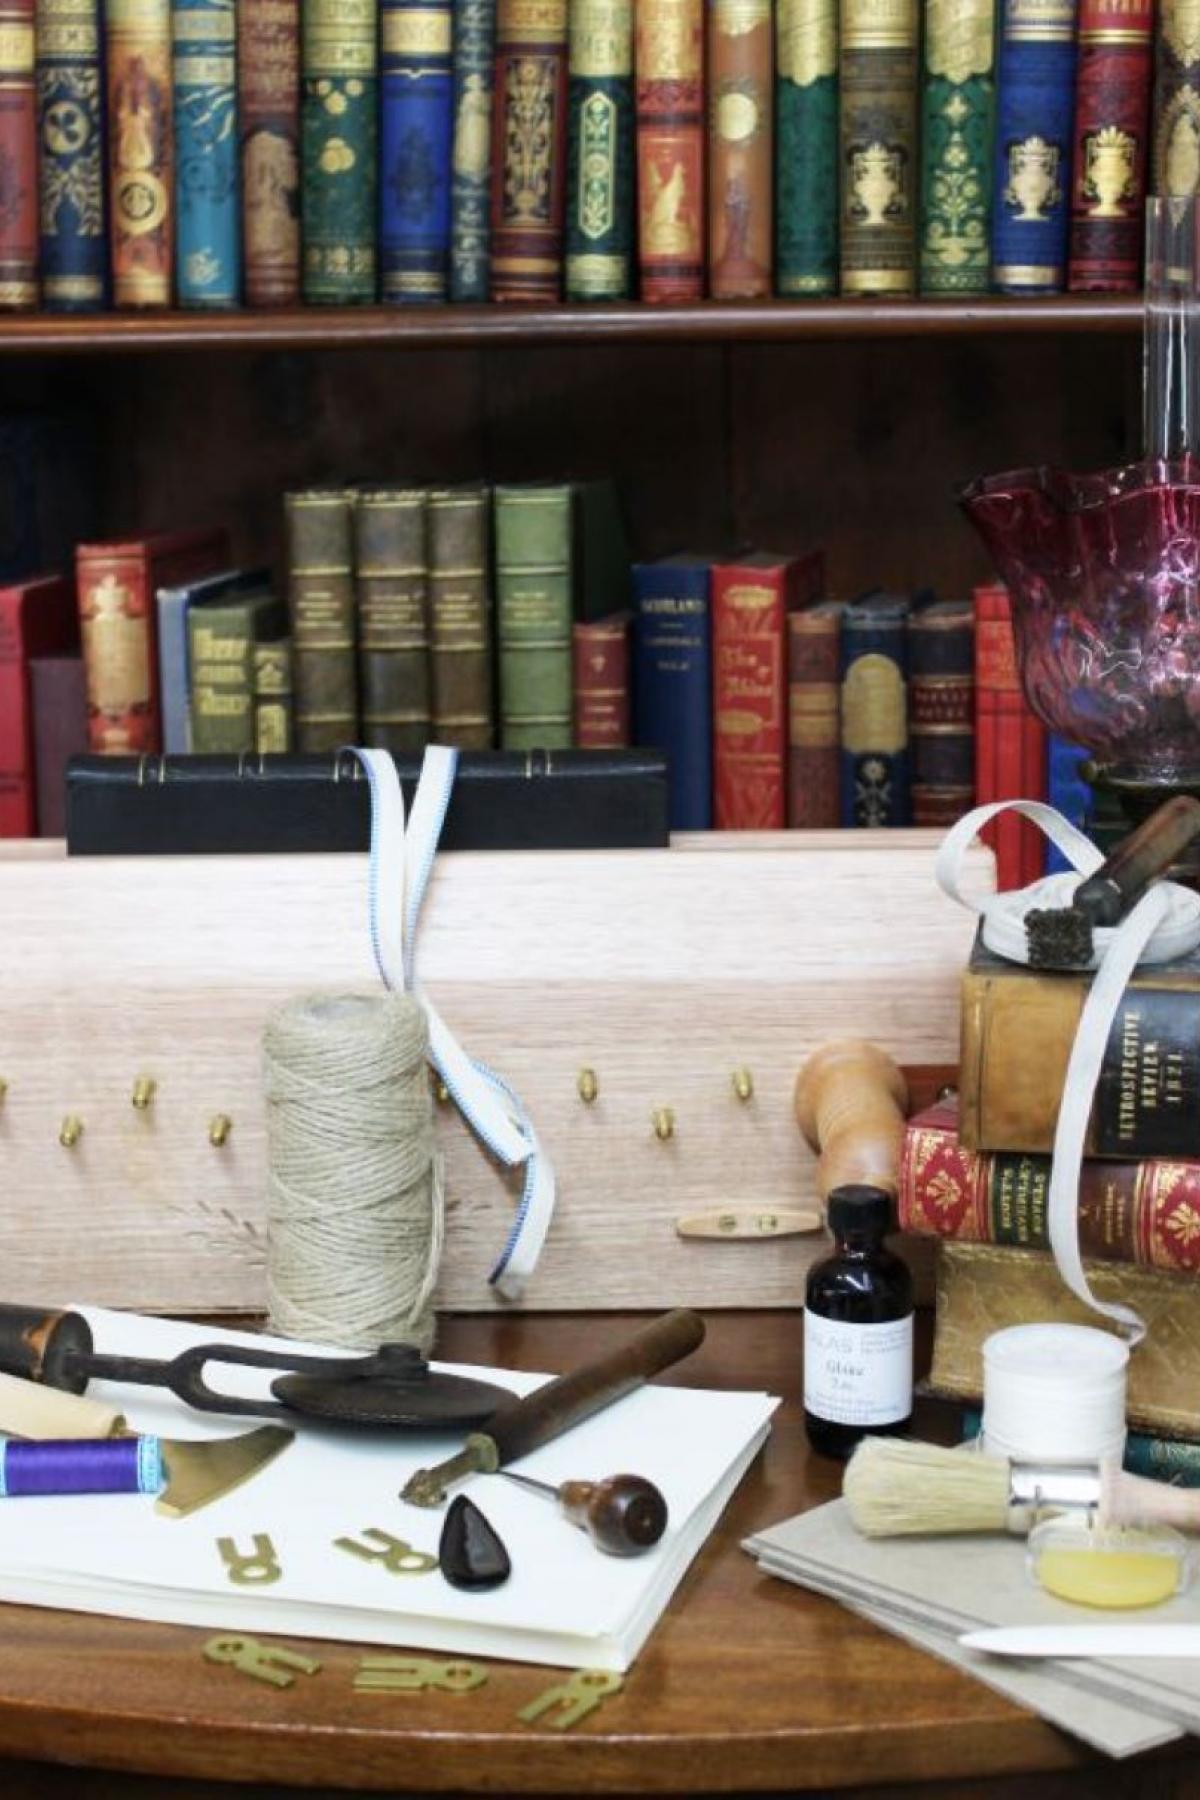
From forwarding to finishing, and all of the steps in between, this exhibition celebrates the bookbinder, and the unique combination of utility, dexterity and artistry required to excel at this ancient craft. On display in 2017 was a variety of exposed bindings; old, rare and fine bindings; bookbinding supplies, and tools and equipment from Rare Books & Special Collections and the curator’s personal collection. In 2018, this exhibition was converted into the following online display.
Curator: Lee Hayes

The Three P's: Papyrus, Parchment and Paper
So omnipresent in our daily lives is paper that it's easy to take it for granted. It allows us to communicate, to teach, to illustrate and to create. It forms the newspapers, magazines and books that we read, it adorns our walls and our wallets, and as a tissue it is our best friend when we have a cold.

Folding the leaves
As the knowledge of papermaking spread it was discovered that sheets of paper could be folded. In fact paper was pliable enough to be folded several times. This process of folding became the first step in the craft of bookbinding.

Beating, rolling, pressing, and collating
Until the late 1820s most books were beaten before they were sewn. The purpose of this was to make the books as solid as possible; softer, hand-made papers were capable of compressing up to half their thickness. A beating-stone was required for this purpose.

Sewing and other methods of leaf attachment
Once the sections had been collated, the next step in the binding process was to sew them together. The purpose of sewing was to connect the leaves in such a way that they would be firm and yet easily opened when bound; it also provided the best means of attaching the book to its cover.

Endpapers
When opening an old, well-read book, readers will inevitably find its first and last sheets have suffered more than those in between. It is the purpose of endpapers, or endsheets as they are also known, to protect the valuable text at the beginning and end of a book, essentially taking up any strain of opening the covers which would otherwise be on its first and last sections.

The marbled endpaper
Marbling, or marbleising as it is also known, was a method of decorating paper with floating colours. Some of these were arranged in such a way as to resemble marble: hence the name.

Gluing the spine, rounding, and backing
The purpose of gluing the spine, or 'gluing up' as it was known in the trade, was to hold the sections together, such that they did not shift when it was time to 'round' and 'back' the book. Rounding and backing did not form part of the bookbinding process until the 1500s, so glue was not required before then.

Boards and their attachment
Whether wood, paste-board or other, the boards provided the ultimate protection for any book, bound or cased. Attachment of the right boards in the correct manner was crucial if the book was to retain its strength over time.

Edge trimming
Since the sewn textblock was composed of folded sheets, the edges need to be cut so that every page could be turned. The time-honoured method for binding books is 'in-boards'.

Edge decoration
The practice of standing a book on its edge is relatively new. Until the 16th century books were shelved in a variety of ways, the most common of which involved piling them horizontally with their fore-edge facing outwards.

Headbands
The headband was a decorative band comprised of silk or cotton thread wrapped around a supportive strip. It was positioned between the back of the folded sections and the book covering at head and tail of the spine, its purpose originally one of function not beauty. It provided the spine with additional support and filled the space on the back of the book that was lower than the board edges.

Spine lining
Surprisingly little has been documented about the purpose or indeed the need to line the back of the book before it was covered.

Cloth
One of the single most important events in the history of bookbinding is the development of bookcloth. Its invention is generally attributed to London bookbinder Archibald Leighton who, in 1823, collaborated with a dyer to transform plain cotton fabric into a material suitable for covering books.

Covering the cased book
Rarely were the boards of a book cased in cloth attached before covering. Instead they were cut to a size proportionate to that of its pages. The square, or projection beyond the book edge, varied depending on the item to be covered but it was usually about one sixteenth to a quarter of an inch.

Leather
For centuries leather had been an important covering material for books. In The history of English craft bookbinding technique, Middleton suggested that leather had been in use in England since the Saxon times.

Covering with leather
Before the binder could commence covering they needed to nip off a small piece of each board, at head and tail, near the joint and the headbands. This process, called back cornering, provided the headbands with a place to lodge, without protruding from the sides of the book once it was covered.

Cover decoration - hand tooling
One of the oldest forms of cover decoration, ‘tooling’ involved the use of metal devices known as finishing tools. Usually heated, these implements were impressed into the leather surface to create a pattern or design.

Cover decoration - blocking
Until the 19th century every letter, ornament or unit of decoration had to be applied to a book’s cover or spine using a separate heated tool.

When bindings go bad
There are many reasons why bindings begin to fail. A small percentage of these can be attributed to poor workmanship and inappropriate choice or quality of materials used during the initial binding binding process; the vast majority, however, can simply be chalked up to the ravages of time.

Good, better, best
Not to be confused with 'poor', 'fair', or 'fine' (for these are booksellers' terms), the 'Good, Better, Best' cabinet was created to showcase some of the curator's personal favourites from the collection.

Acknowledgements and recommended reading
The curator would like to thank all of those who have provided inspiration for Cover to Cover: Exposing the Bookbinder's Ancient Craft. Without your knowledge, support and enthusiasm, this exhibition would not have been possible.